How-to automate Microsoft Teams
Create a channel and post to it from a flow — the useful shape being a robot that finishes its work and announces the result where the team already is.
This guide uses Microsoft Teams 365, which talks to the Microsoft Graph API.
An earlier Robomotion.MicrosoftTeams package is hidden in the Designer and cannot be added to
new flows. Existing flows that reference it keep working — its files are preserved — but
anything new should be built the way this page describes.
1. Register an application in Azure
Teams 365 authenticates as an Azure AD application, so start there: Register your application covers the registration itself and the Microsoft Graph permissions.
Then collect the two values the package needs.
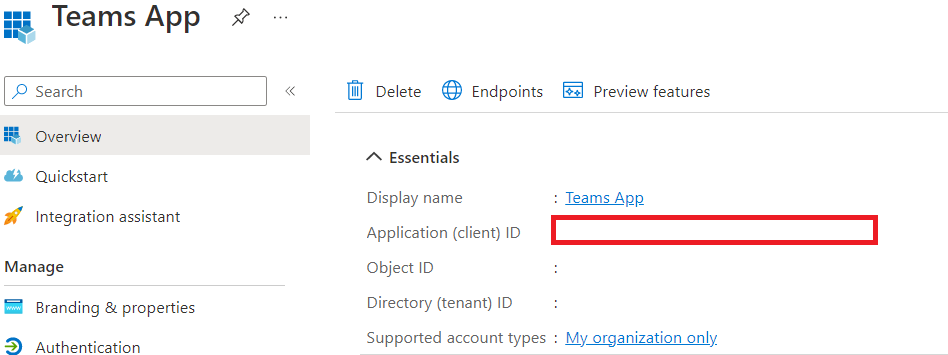
From your registered application's overview page, copy the Application (client) ID.
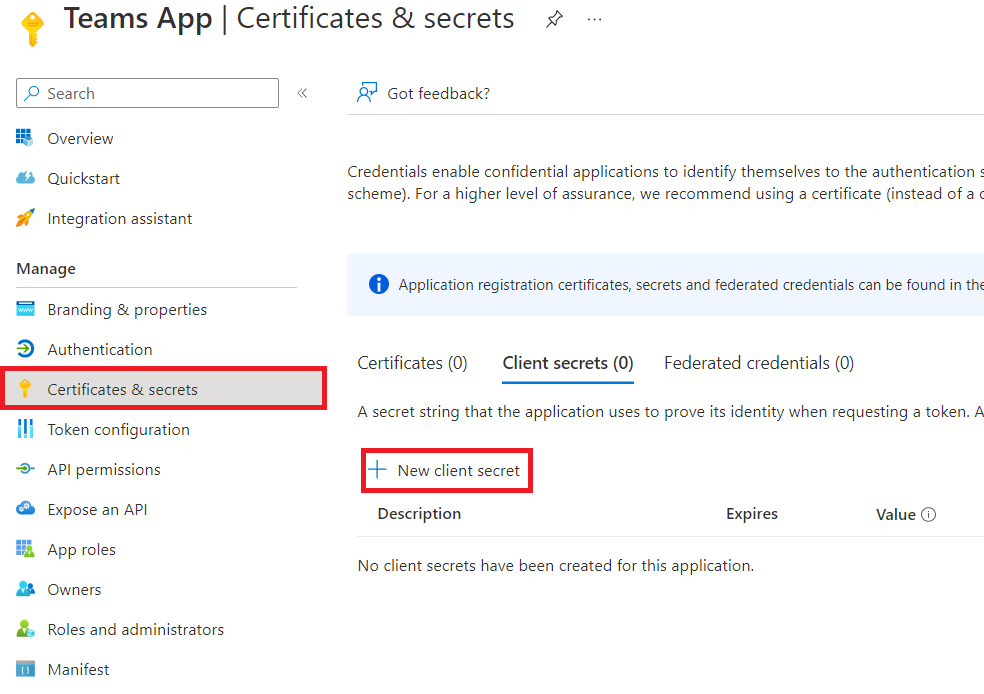
Under Certificates & secrets, click New client secret.
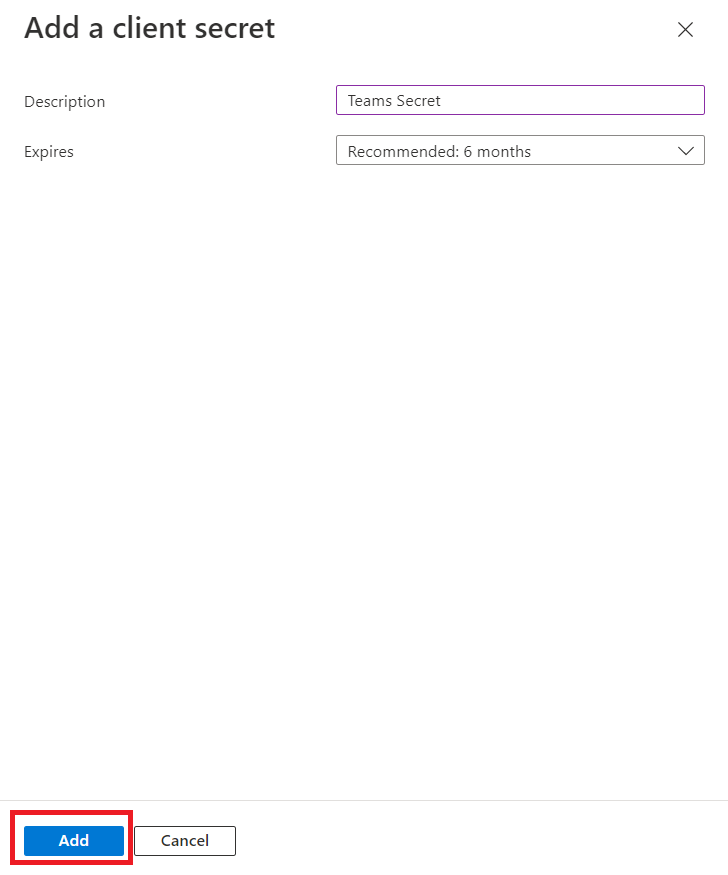
Give it a description and an expiry, then Add.
Copy the secret's Value immediately. Azure shows it once; leaving the blade means generating another one.

Each operation needs its own Graph permission, and a flow that is missing one fails at that
node rather than at Connect. Creating a channel needs Channel.Create, posting to one needs
ChannelMessage.Send. Grant admin consent afterwards — most tenants require it.
2. Put the credentials in a vault
Add the tenant id, client id and secret to a vault rather than typing them into a node. Vault contents are encrypted in your browser before upload, so the secret is ciphertext everywhere except on the robot that uses it — see the Security Model.
Teams 365 wants all three values together, so the item type is Document rather than API Key. Create the item, name it something you will recognise in a dropdown, and put the values in its content as JSON:
{
  "tenant_id": "<your directory (tenant) ID>",
  "client_id": "<the Application (client) ID from step 1>",
  "client_secret": "<the secret Value from step 1>"
}
The Slack guide walks through creating a vault screen by screen if you have not made one before — including the Secret Key, which is shown once and cannot be recovered.
3. Build the flow

- Trigger → Inject
- Microsoft Teams 365 → Connect
- Microsoft Teams 365 → Create Channel
- Microsoft Teams 365 → Send Channel Message
- Microsoft Teams 365 → Disconnect
- Flow → Stop
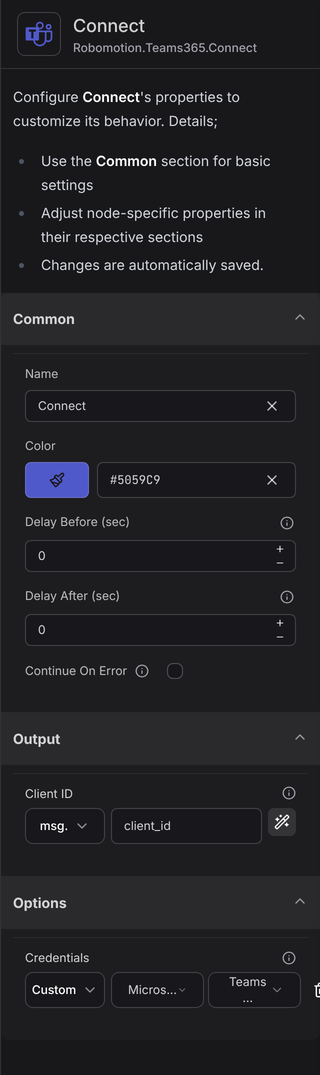
Connect authenticates once and returns a Client ID that every other node in the package takes as an input; Disconnect releases it at the end. Each node can also carry its own credentials instead, which is worth knowing but rarely worth doing — one Connect is easier to change than six.
4. Connect
Point Credentials at the vault item from step 2.
5. Create a channel
Set Team ID, Channel Name and, optionally, Description.
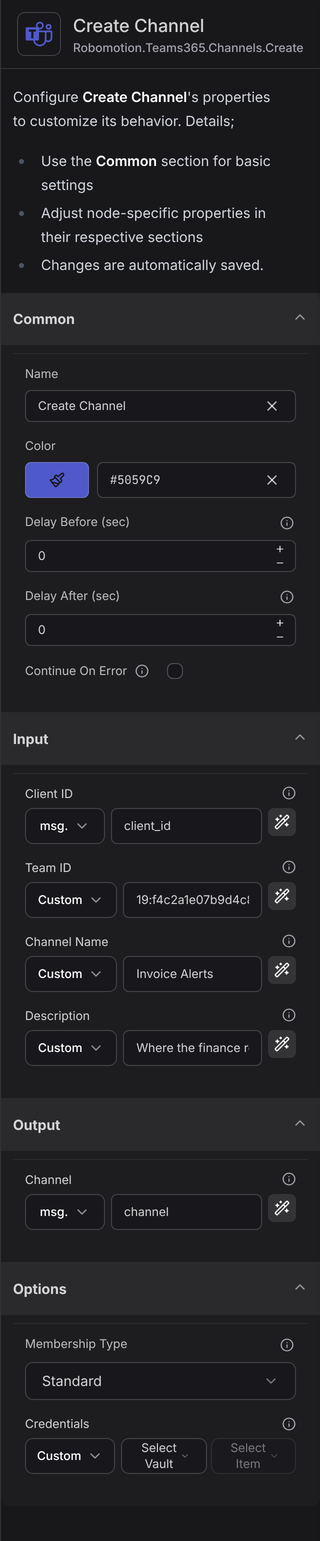
The team id is the awkward part. Read it out of a Teams channel link — it is the groupId
query parameter — or list the teams from the flow itself with List Teams and take the id
from its output, which is the version that survives someone renaming the team.
Membership Type defaults to standard, which is visible to everyone on the team. The
other options are private and shared.
6. Post the message
Set Team ID and Channel ID, then the Message Content.
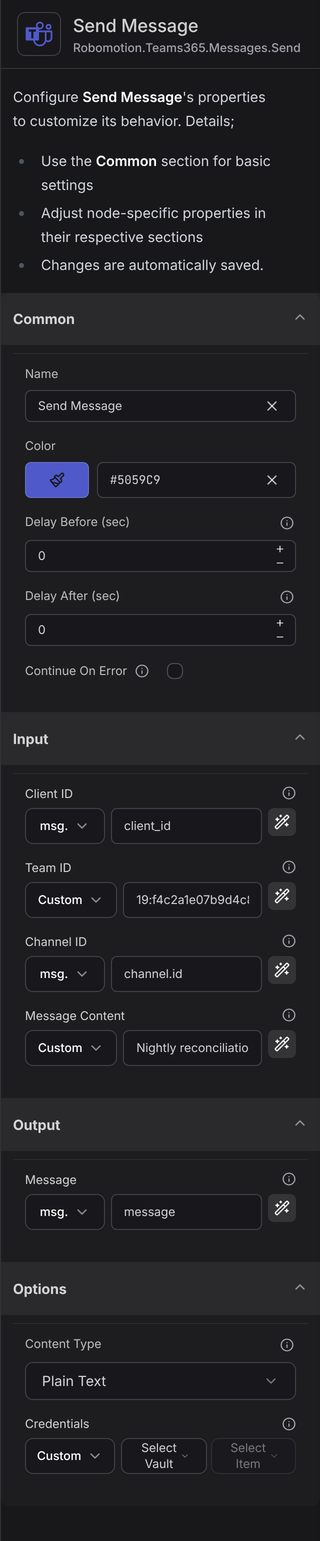
Take the channel id from the Create Channel node's output rather than pasting a literal, so the
two steps stay connected when the channel is recreated. Content Type is text by default;
switch it to html when the message needs formatting.
What this package does not do
There is no Create Team node. Teams 365 manages the channels, messages and members of teams that already exist — creating the team itself is done in Teams or by an administrator. The package reference lists all eighteen nodes.