How to add data to the queue?
A queue is a container that enables you to hold an unlimited number of items. Queue items can store multiple types of data. A queue is usually considered a list of pending jobs executed by priority or other criteria related to the underlying order in which several jobs are executed.
In this case, we will explore how to use the 'queue' package and its nodes in the flow.
How to Setup?
To begin, Login to your Robomotion workspace. If you haven't registered yet, you can create your workspace from the provided link.
About Queue Package
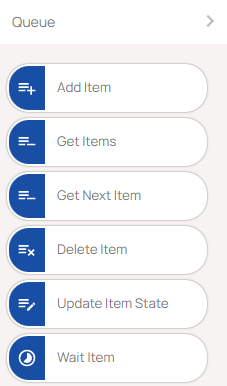
The Queue package consists of six node options that enable you to easily manage your files within your workflow.

How can a new queue be created by accessing queues through the Admin Console?
- To begin, login in to your Robomotion workspace.
- Click on "Queues" in the Admin Console.
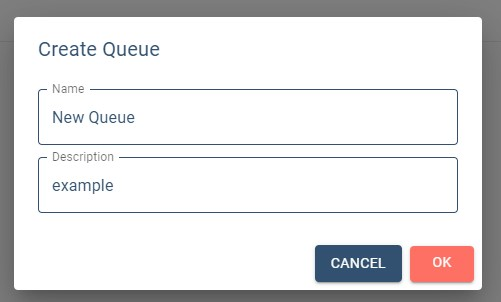
- Click on "Create Queue."
- Enter the Name and description for the queue you are creating.

- Click "OK." The queue has been created.

- Let's create a stream to add data to the queue we've created.
What is the 'Add Item' node?
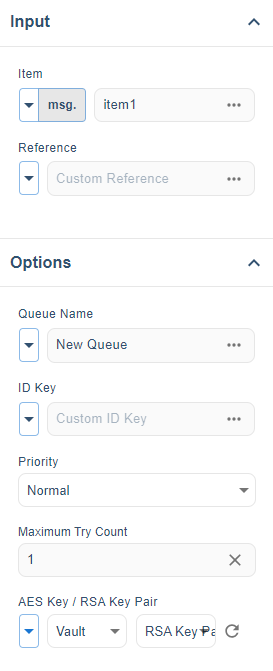
You can add items to the queues you've created using the 'Add Item' node. Enter the data you want to add in the input field of the node. You can choose the priority for the items. The options for priority in the node are Low, Normal, and High.
To use this node, credentials must be selected. To set up credentials, follow the steps below:
- Click on 'Vaults'.
- Click on 'Create Vault'.
- Enter the name and description for the vault.
- Click on 'Create'.
- Copy the generated secret key.
- Click on 'Create Item'.
- Select 'RSA Key Pair'.
- Click 'Save' and then 'Close'.
- Inject the created vault into the robot.
Now, you can add items to the queues with the 'Add Item' node, and the credentials are set up for node usage.
Flow Steps
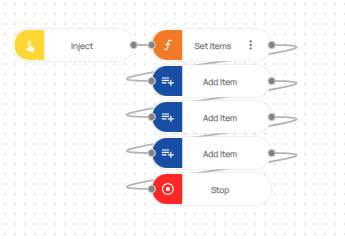
- The "Inject" node is used to initialize the flow.
- Add a function node to define the objects you want to add to the queue.
Function Node Named “Set Items”:
msg.item1 = {
  'name': 'item1'
}
msg.item2 = {
  'name': 'item2'
}
msg.item3 = {
  'name': 'item3'
}

return msg;
- We use the 'Add Item' node to add the objects item1, item2, and item3 defined within the function to the queue with different priority levels.
- Input the items you want to add from the function into the 'Add Item' node.
- Enter the queue name information in the Options field.
- Select the priority for the item to be added
- Credentials are selected.

-
Sequentially, item1, item2, and item3 are added using the 'Add Item' node with priority levels of Normal, High, and Low, respectively.
-
Stop the flow with the "Stop" node.

- You can view the added objects in the 'New' section of the queues in the Admin Console.

- Let's examine how the objects added to the queue are processed within the flow.
Flow Steps
- Inject node is used to initialize the flow.
- Retrieve the added objects using the 'Get Next Item' node.
- In the 'Options' field of the 'Get Next Item' node, enter the queue name and credential information.
- You can see which object is being processed using the Debug node.
- You can observe that the object with a high priority level is processed first. In this example, item2 is present in the output of the Debug node.
- When you check the queues in the Admin Console, you can see that there is a value of 1 under In Progress.

Here you can access the complete flow by clicking on the following link:
https://casestudies.robomotion.io/designer/shared/NR94m16G4DYewvFPEPCYqv
https://casestudies.robomotion.io/designer/shared/TYiDnGwWU17asUasyySTTg
