Generate Personalized Outreach Videos

Personalized videos are becoming increasingly popular as a way to stand out in the crowded email inbox. Loom, an online video messaging platform, enables users to create custom videos with a personalized touch. These videos can be included in outbound emails for a more engaging approach to customer outreach.
The below screenshot shows an example outreach video recorded while visiting a customer website:
But creating a personalized video for each outreach is a difficult and time-consuming process. Robomotion can be used to auto-generate this content for you by utilizing different tools such as a video recorder, Chrome browser and Loom for uploading and sharing the content.
Setup
We will start by creating our flow in Robomotion. We will then set up a Chrome profile that keeps our session so that we won't need to automate a login page and directly use Loom. We will use OBS Studio, an open-source video recorder, and streamer. We will set up the default settings for our automation in OBS Studio. And lastly, we will set up Google Sheets for our robot to use in the automation process.
Flow setup
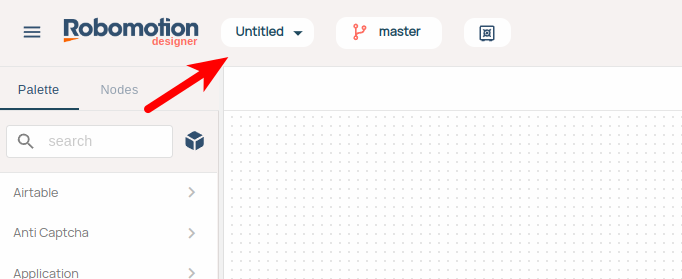
Log in to your workspace, and open the projects dialog by clicking the button right next to the Flow Designer logo.
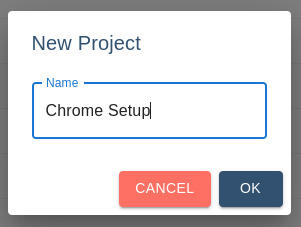
Click the New Project button, set your project name as Chrome Setup and press Ok.
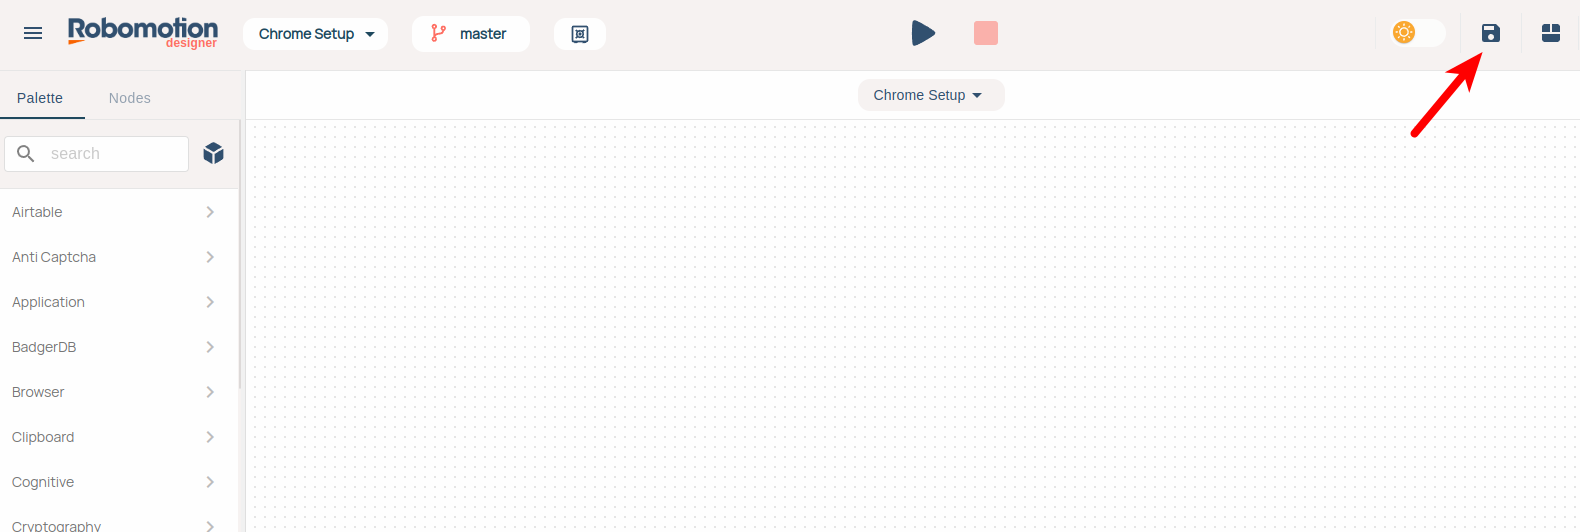
Once the project is created, press the save button.e
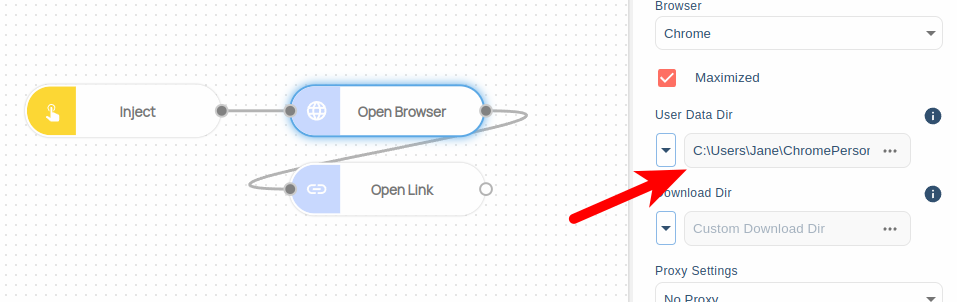
Chrome User Data Directory setup
The Chrome user data directory contains profile data such as history, bookmarks, and cookies, as well as other per-installation local state. We will use the User Data Directory to save the login state to Loom so that we will not have to develop login automation for every flow run to execute.
Create the following flow by drag-and-dropping the nodes from the node palette, or by right-clicking on the empty board. You can also search the nodes by name:
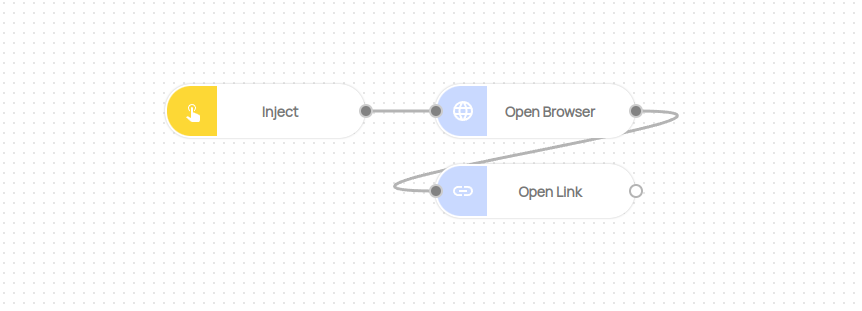
Below is the list of nodes used in this flow:
- Trigger -> Inject
- Browser -> Open Browser
- Browser -> Open Link
Now create a folder somewhere on your file system, something like the below:
- Windows
- Mac
- Linux
C:\Users\Jane\ChromePersonalized
/Users/jane/ChromePersonalized
/home/jane/ChromePersonalized
After creating this folder on your system, click the Open Browser node and fill the User Data Dir property with the full path of your folder.
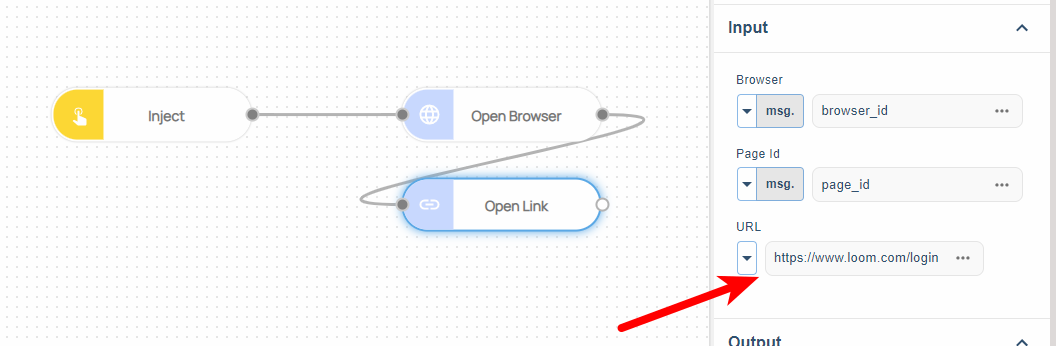
Click the Open Link node and fill the URL property with https://www.loom.com/login.
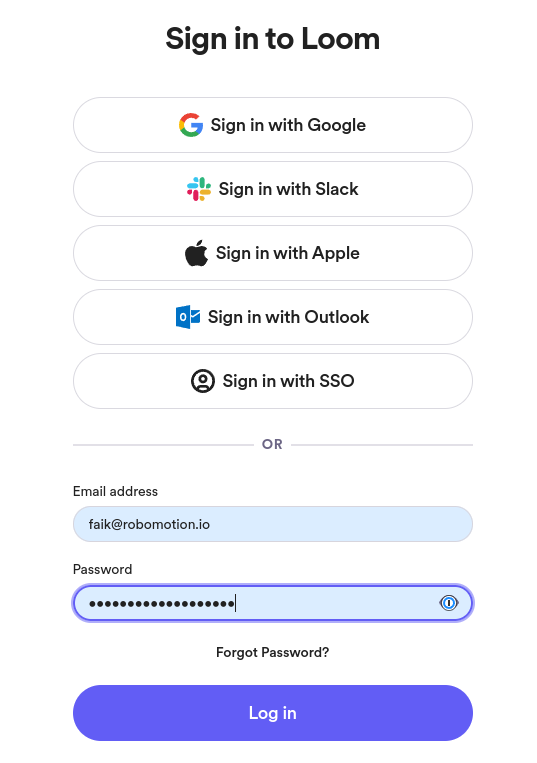
Run the flow and when the automated browser is opened, manually log in to loom. Because we are using User Data Dir, the next run of this flow will keep this login state in the given User Data Dir.
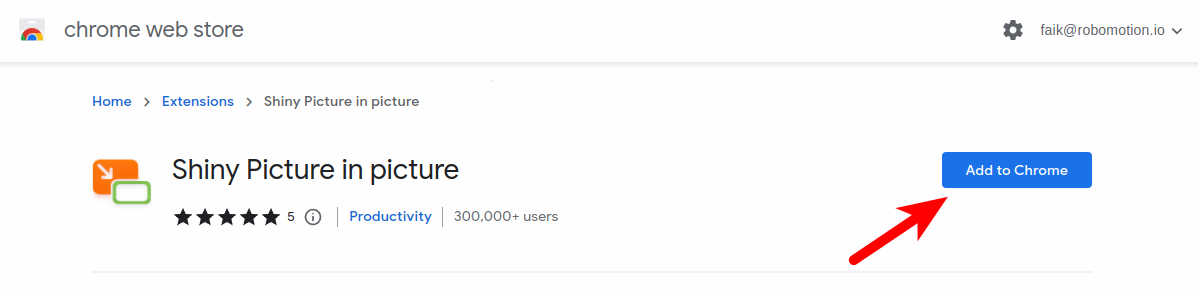
Go to Shiny Picture in picture Chrome Extension web page and click the Add to Chrome button.
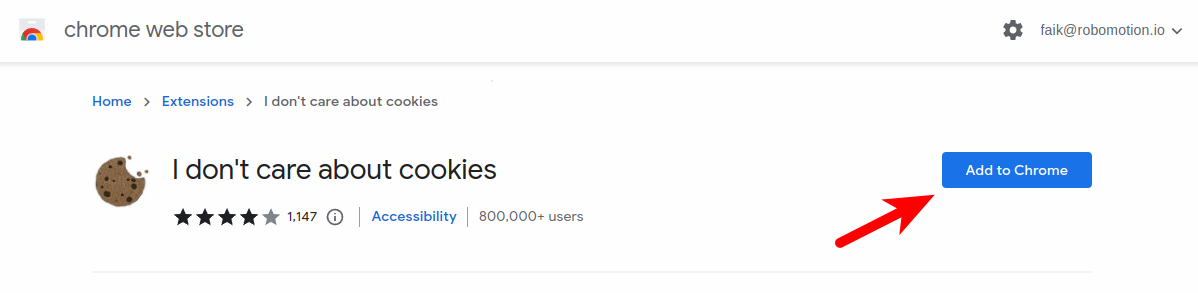
Go to I don't care about cookies Chrome Extension web page and click the Add to Chrome button.
You can now stop the flow. This flow was only used for preparing the Chrome profile that we are going to use. The profile now can auto-login to loom. when we open the page and also have the Chrome extensions installed that we need.

Outreach videos folder setup
Create a folder named Outreach on your system, and two more folders named Videos and Uploads under the Outreach folder.
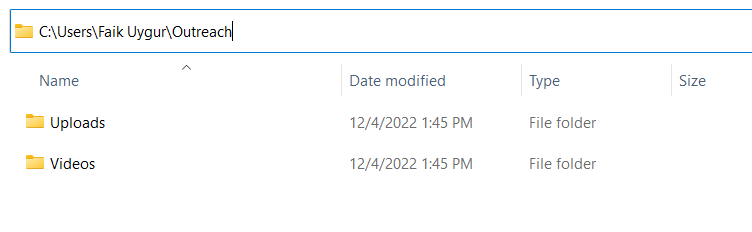
Folder names are case-sensitive, so Outreach, Videos and Uploads all have capital first letter.
- Windows
- Mac
- Linux
C:\Users\Jane\Outreach
C:\Users\Jane\Outreach\Videos
C:\Users\Jane\Outreach\Uploads
/Users/jane/Outreach
/Users/jane/Outreach/Videos
/Users/jane/Outreach/Uploads
/home/jane/Outreach
/home/jane/Outreach/Videos
/home/jane/Outreach/Uploads
OBS Studio setup
We are going to be using an open-source video recorder, OBS Studio to record the video we are going to be uploading to the Loom website.
Go to the OBS Studio website. Download and install OBS Studio. Start the OBS Studio application.
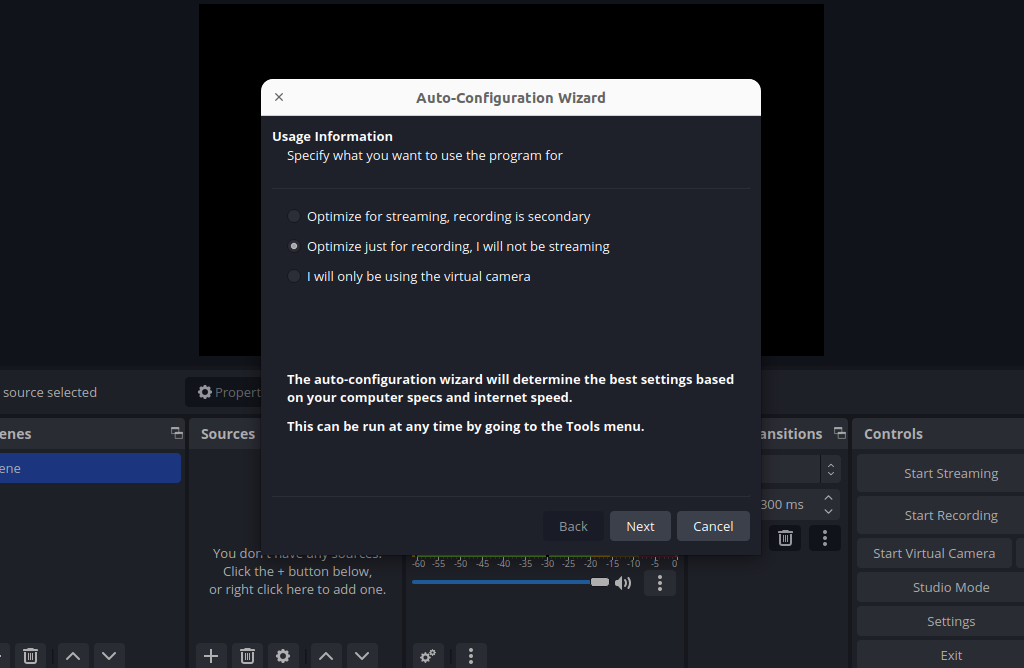
On start, if you see an optimization popup, select Optimize just for recording and press Next for the initial setup to finish and click Apply Settings at the end.
Some systems may not bring this popup.
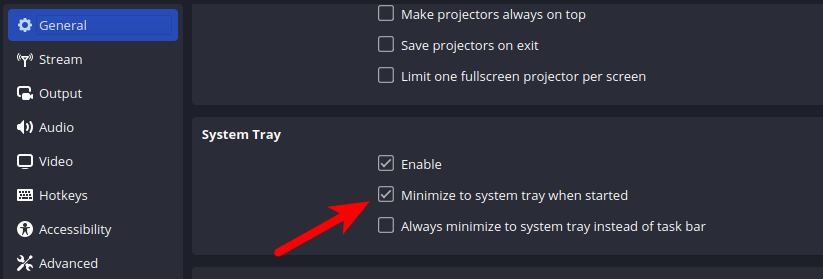
Open File -> Settings dialog. From the General tab, check the Minimize to system tray when started.
From the Output tab,
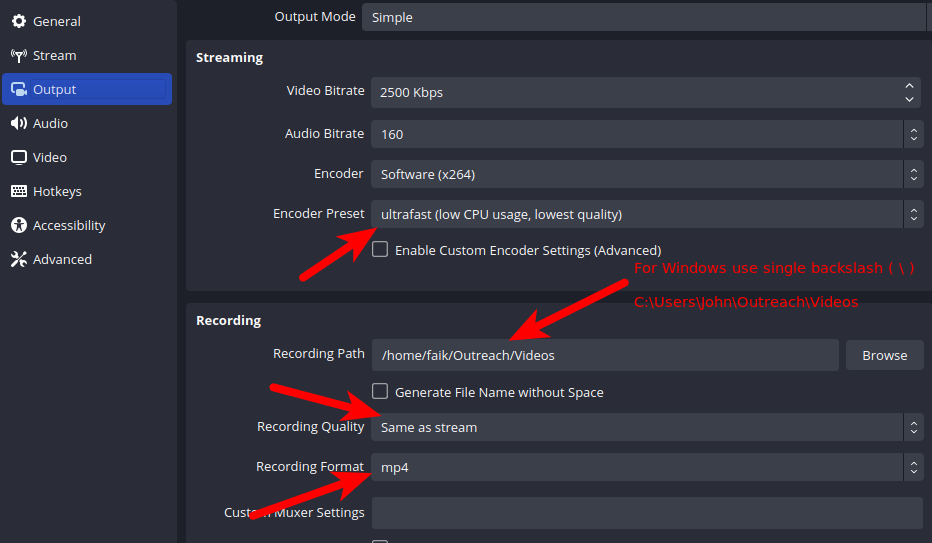
- Change the Recording Format to mp4
- Change the Recording Path to your full Outreach/Videos folder path
- Change the Recording Quality to "Same as stream"
- Change the Streaming Encoder Preset to ultrafast (low CPU usage, lowest quality)
You have to set the Recording Path to what you have created on your system and not what is shown in the screenshot.
Encoder affects the machine performance, so we are selecting the lowest possible. You can later experiment with the quality.
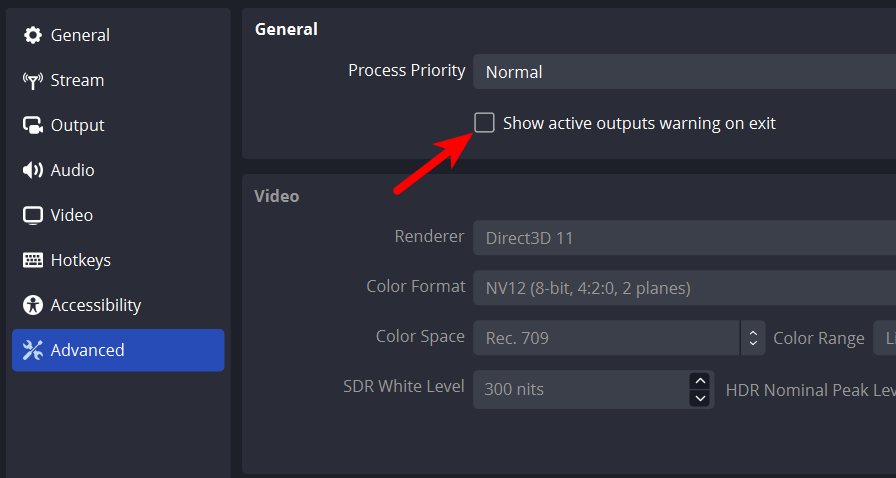
From the Advanced tab, uncheck the Show active outputs warning on exit.
Click Apply and Ok to close the Settings dialog.
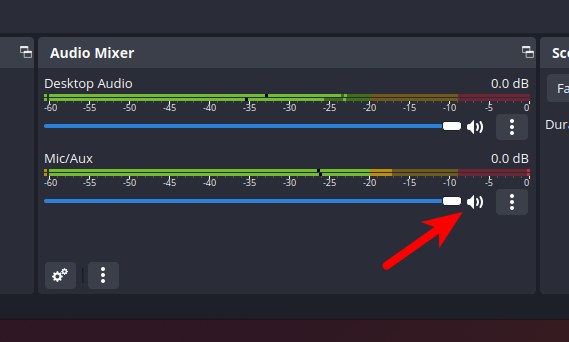
We will only need the recorder to record Desktop Audio, so we will disable the Mic/Aux. Click the speaker button right next to the Mic source.
Now we are going to add a video source for the OBS recorder. Click the plus button in the Sources panel below.
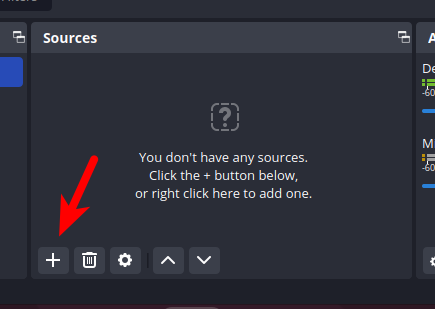
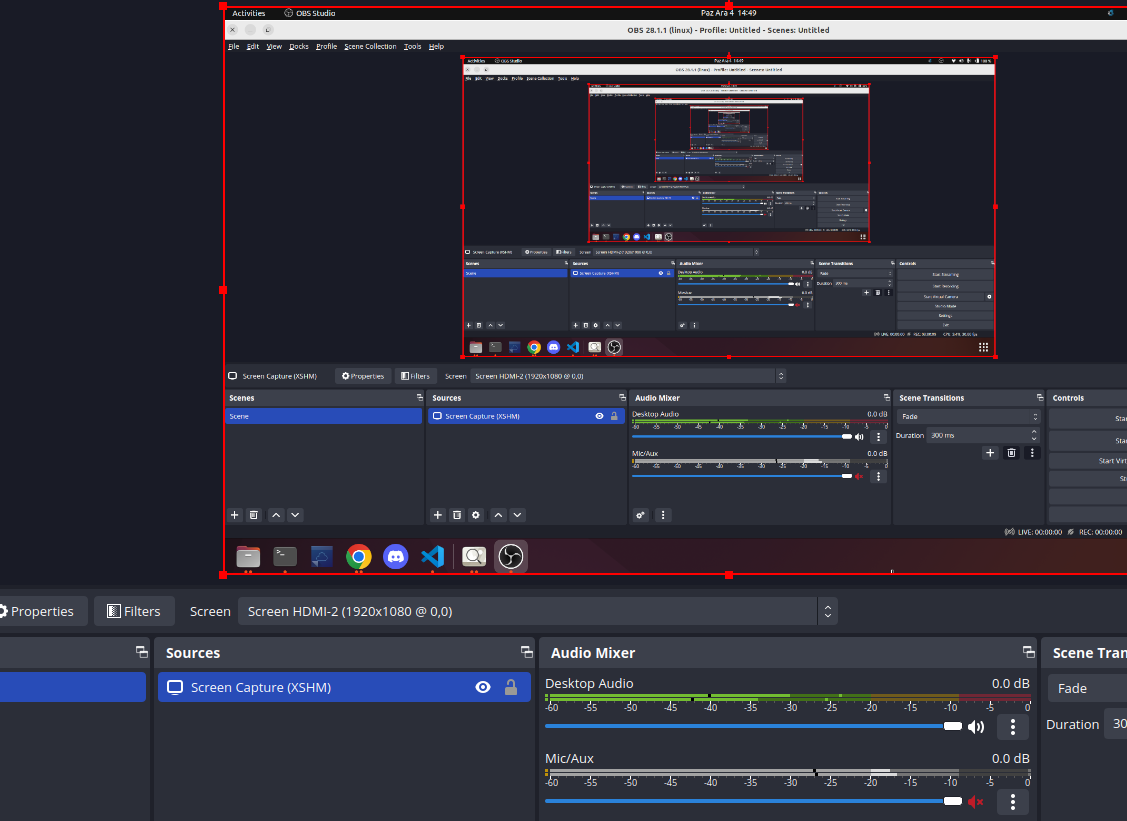
Select Screen Capture or Display Capture, give any name to your capture source and press Ok. You should see something similar that looks like the below screenshot. Yours may differ but you should start seeing a mirror of your Desktop in the OBS Studio.
Close the OBS Studio application with Alt + F4 or from the File menu by selecting Exit.
Google Sheets setup
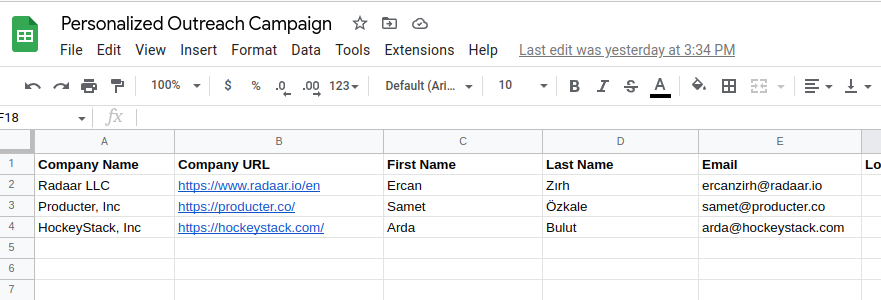
Open this template Google Sheets document and create a copy for your self and update what is inside this list with your outbound reach list.
For the robot to read and update this new document you have created, the robot has to be authorized and have a Google Sheets authorization token.
You have to follow two documents for this:
For the second document, you only need to create a Vault and add your OAuth2 credential from the first step.
Outreach video setup
You have to have an Outreach video for your customers. You can use Loom or even OBS Studio to create one for yourself. 30 seconds would be ideal. Here is a fake outreach video that you can use for your experiments.
Record a 30 seconds video and upload it to Youtube as an Unlisted video.
In your video try to have 5-6 seconds that you do nothing and then your message should start.
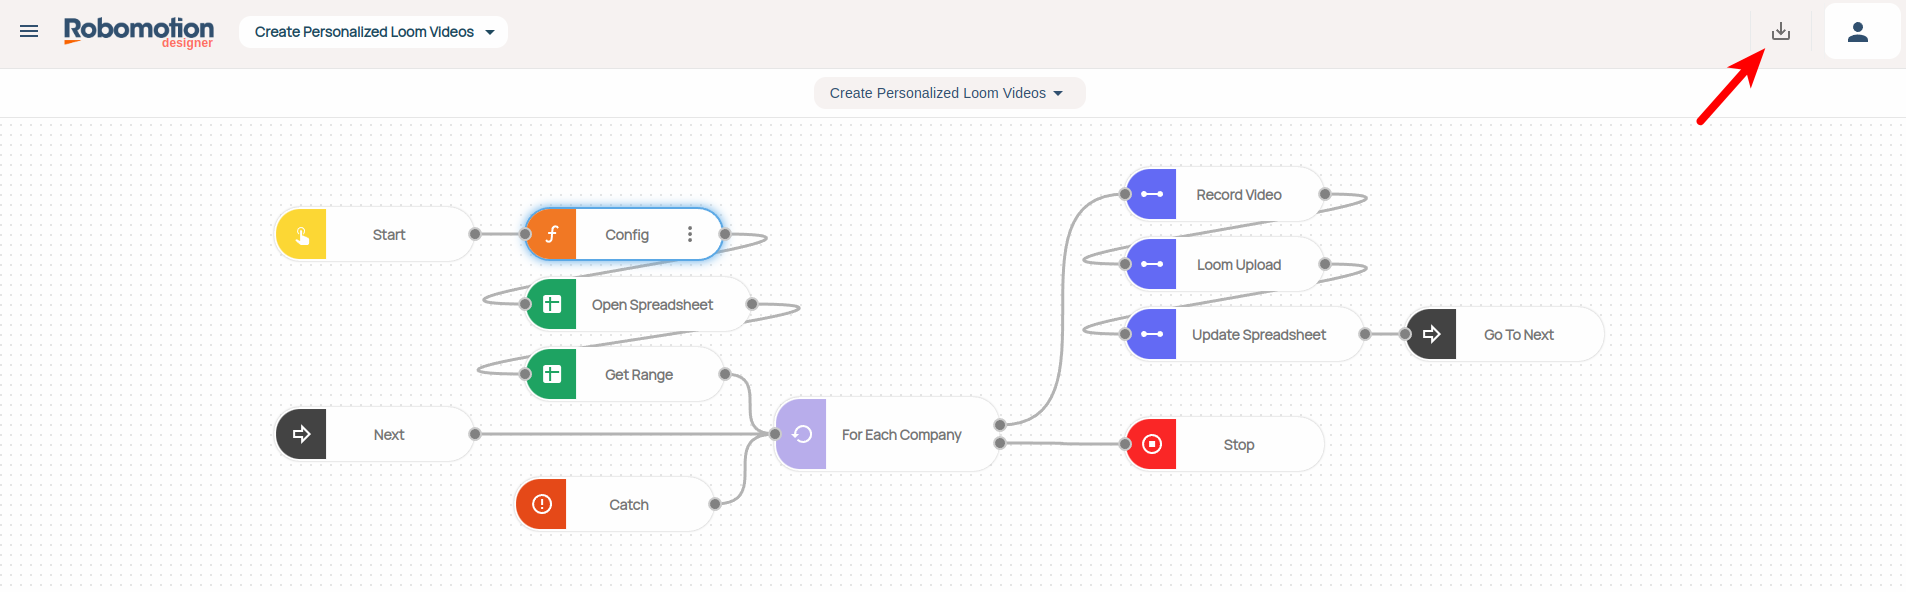
Recording
Here is the flow that we are going to run after all this setup.
Click the Import icon at the top-right to be able to edit and save this flow in your workspace.
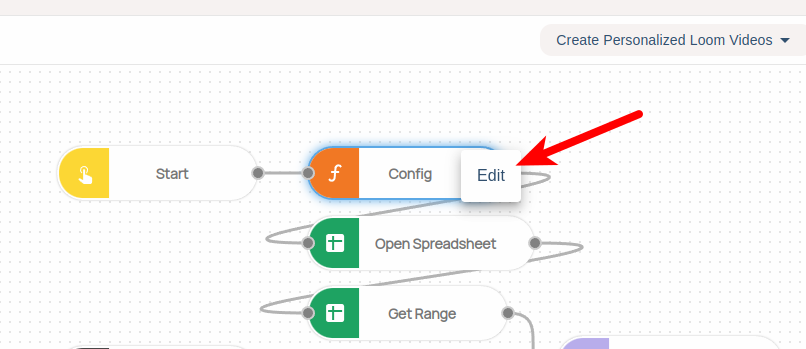
After importing the flow, click the Config node's Edit menu item.
Update the links and paths in this editor with your own links.
Only change what is between the double quotes and nothing else.
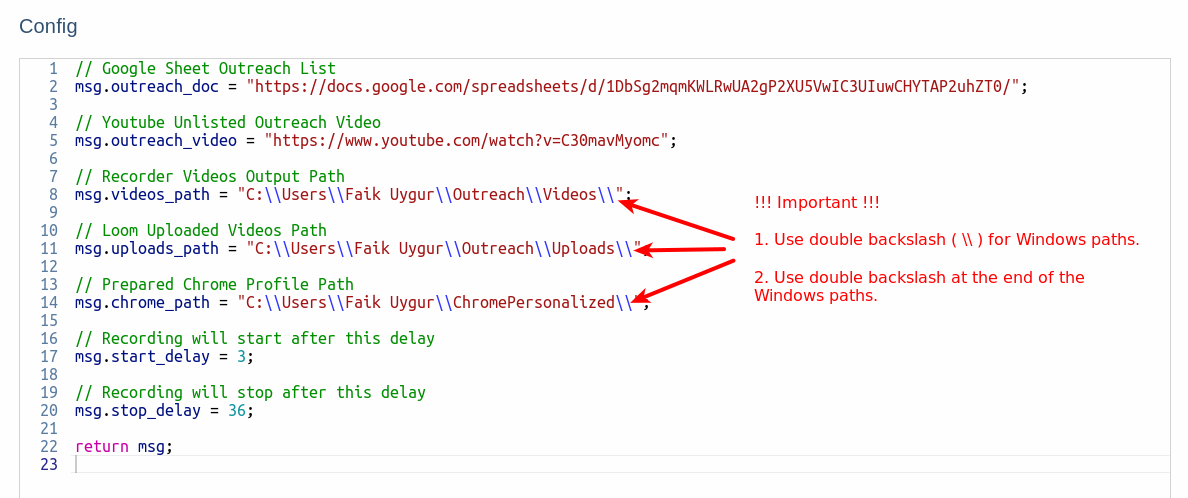
- Change outreach_doc line with your own Outreach Google Sheets link
- Change outreach_video line with your own Outreach video you have uploaded to Youtube
- Change videos_path line with your full path of the Outreach/Videos folder on your system
- Change uploads_path line with your full path of the Outreach/Uploads folder on your system
- Change chrome_path line with your full path of the created Chrome Profile folder on your system
- Change start_delay and stop_delay with experimentation.
Start Delay is a delay before recording starts, stop_delay is how many seconds after recording started should the flow stop recording. Every system will perform differently so with delays you can finetune the recorded video.
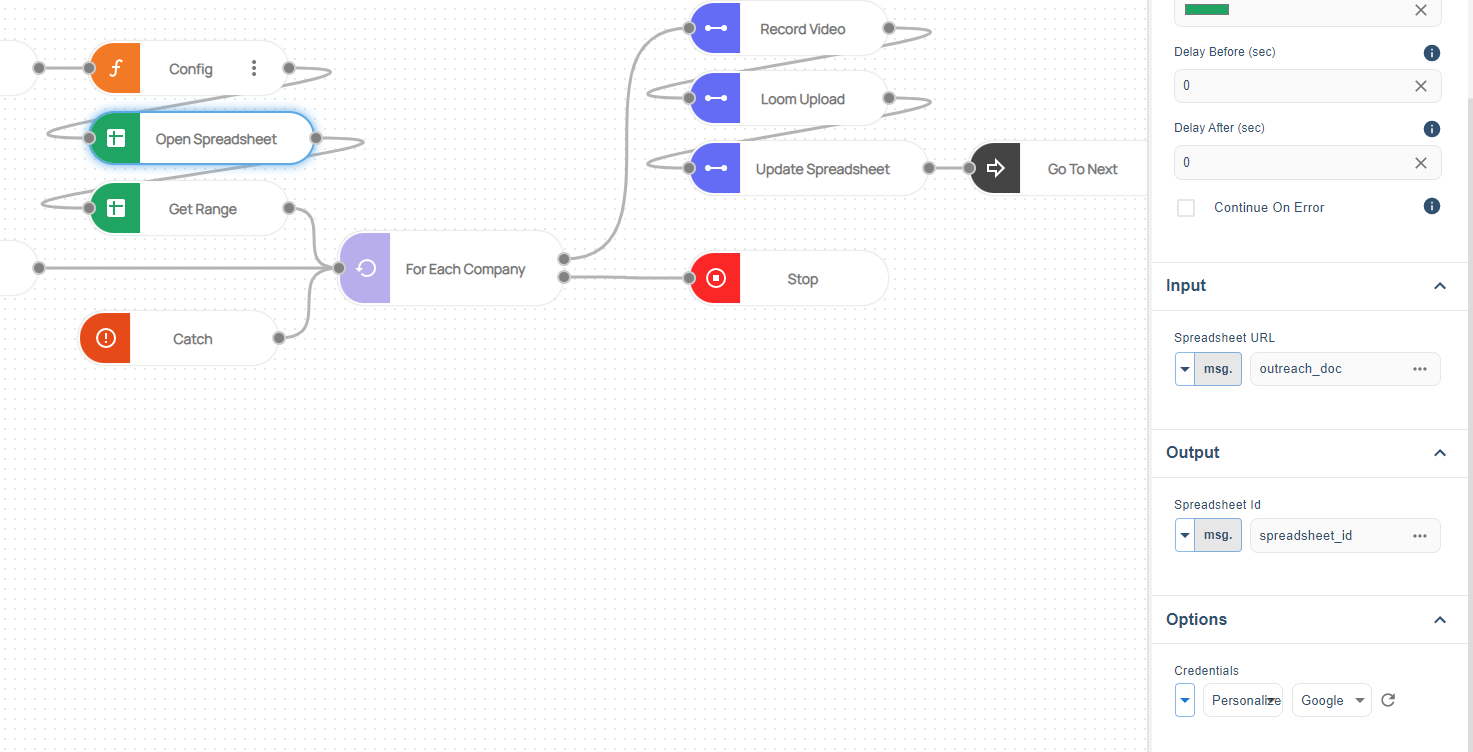
Click the Open Spreadsheet node and select the Vault and Vault Item property of the OAuth token you have added to the Vault.
Trouble-shooting
We have created a Youtube video that follows this blog post.
If you have trouble setting up this flow, please Join our Discord Community. You can ask questions in our #support-en channel.